

I’ve successfully completed my DIY 3D printer project and now I’m excited to elevate its capabilities. My goal is to transform my trusty 3D printer, originally designed for plastic printing, into a versatile dual-end effector printer that can seamlessly switch between tasks. One of my next ventures: 3D printing with clay.
If you haven’t had a chance to explore my “DIY 3D printer project,” you can find it here.
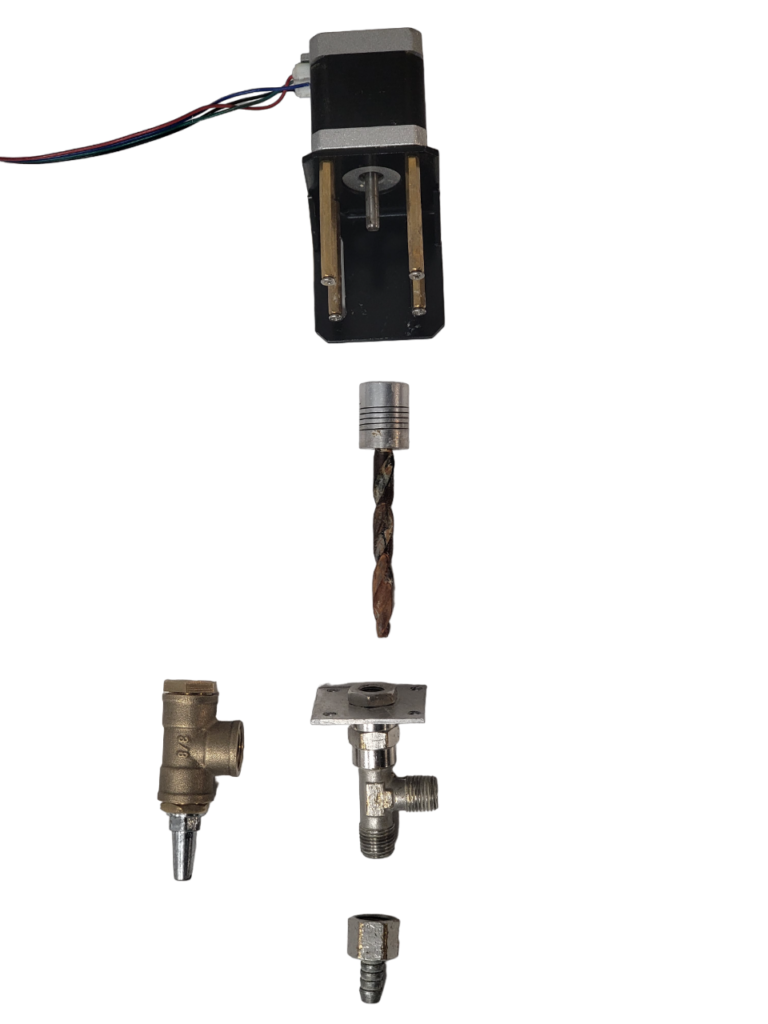
Hardware:
Here’s a list of the key hardware components I’ll need for this exciting upgrade:
- Nema 17 motor
- Nema 17 L bracket
- Standoffs 4 nos
- 5X8 Nema 17 coupler
- 8mm wood drill bit
- SS T fitting 1 nos
- Female to female threaded pip connector 1nos
- male to female threaded pipe reducer 1 nos
- swivel tip fitting (threaded female)
- Pneumatic compressor
- 12 mm flexible transparent pipe
- pneumatic pushin connector (12 mm) 2 nos
- Pneumatic pushin connector (6mm) 1 nos
- 500cc glue dispensing syringe with piston or you can buy off the shelf clay extrusion syringe.

After assembling and mounting the end effector, I’ll connect its motor wire to the extruder socket of the motherboard. In my case, I’m using the SKR 1.4 Turbo motherboard, but your setup may vary.
Software:
At this point, I faced two choices. I could either permanently modify the firmware settings to accommodate clay extrusion requirements or control the printer through GCode. Given my plan to exclusively use it for clay printing for a while, I decided to make permanent changes.
Designing with computationa tools:
For designing, I rely on Rhino and Grasshopper—a fantastic combination of 3D modeling and computational design tools. I create all my designs using computational design principles, enabling intricate and precise clay printing.
Material exploration:
Before delving into clay printing, understanding the available clay types is essential. There are five main types to consider:
- Earthenware
- Stoneware
- Porcelain
- Ball clay
- Fire clay
Each type behaves differently based on its composition and exhibits varying porosity, especially after firing. For my initial vase-printing projects, I opted for Stoneware clay.
Clay is available in either wet cubes or powder form. Regardless of the form, knowing the clay’s water content is crucial, affecting workability, pressure requirements, and design size.
Mixing Process:
I ordered wet clay cubes, which come in airtight packaging for freshness. Mixing the clay involves determining the right water-to-clay ratio. After several experiments, I found that a 20% water ratio by weight of clay works best for my setup. My extrusion syringe accommodates up to 500 grams of clay at a time, and I add 100ml of water to achieve this ratio.
Printing with Clay:
Printing pressure requirements vary based on the water ratio. Typically, for a small syringe (500cc) and 20% water content, a normal printing pressure ranges from 2-3 bars. Lower water content necessitates higher pressure. My syringe extruder, sourced from AliExpress, can’t handle pressures above 4 bars, causing air to pass from its piston sides into the clay, potentially leading to air voids during printing.
Firing:
To ensure the best results, I always follow the firing temperature recommendations provided by my clay supplier.

This project is still work in progress.
Upcoming modifications:
- More material exploration with computationally designed models
- Going large scale (on another DIY printer – my new upcoming project)
- New end effector with flexibility to use different diameter nozzles